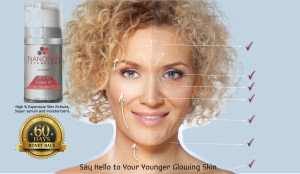
Before and after pictures are very important selling aspects of your beauty business. These are the images potential clients will refer to in order to see just what your skin needling or skin care regimen can do for them. They want to see people who are just like them, with issues concerning skin problems, and how your collagen induction therapy or beauty product transformed their skin into the brand new people they are today.
If potential clients can visually relate to your other clients it could really make a difference in whether or not they make that initial phone call.
Here are few tips to keep in mind next time you are taking before and after photographs for your micro skin needling or skin product marketing.
Plain backdrop. Make sure you are taking your photos with your client against a plain, neutral colored backdrop. A solid colored door or large wall with no paintings is great for this type of photo. This allows viewers to solely focus on the people in the images and not become easily distracted with noisy backgrounds or other disruptive elements.
Lighting is important. Most before and after images tend to be washed out from the camera’s harsh flash. This can be solved by adding as much natural light to the room where you are having the photos taken. The natural light will be enough for the camera to see your client clearly without having to use the flash which diminishes detail. If you aren’t able to add natural light to your photos, make sure your client aren’t directly under a light source, this can cause unwanted shadows within your photos.
Keep the shot steady. When taking before and after photos, using a tripod could greatly increase the quality of the images you produce. The tripod allows the camera to stay steady and focus correctly on its subject without the chance of blurring from movement or shake. People viewing your marketing want to see clear shots of your client, they want to see every aspect of how a person changed from before and after their skin treatment procedures. Also, make sure your camera is on the portrait setting rather than landscape. If you are taking cosmetic photos, move in closer to your client but remember to maintain a clear focus.
Record your settings. Most importantly, record your settings when taking your first set of before photos. This means writing down the time in case you used the natural light of the sun, the distance between the client and the tripod and any other camera-specific settings used. This way, when you take the after photos you will have the exact set-up conditions as the before photos. This will eliminate any differentiations in the images and make for more accurate photos.
Use your best images. Think of your beauty business’s before and after marketing photo as your personal art gallery display. This is your page to post the absolute best skin renewal and correction work you have done to this day. Just like works of art, you want your viewers to see everything you can do to change their lives for the better. Art is supposed to evoke feelings, and that’s exactly what you want your before and after photos to do. Viewers want to see images that move them on an emotional level. These emotions end up driving people to finalize decisions. In this case, you want them to call your business that very moment and schedule a Nanokiss session.
The above may seem a little too detail-oriented for taking simple before and after pictures but keep in mind these images are potential selling points for people visiting your website or looking at your marketing material. Take the extra time to produce quality before and after photos, they truly are an important aspect of your beauty business. These photographs show potential clients exactly what you can do for them.
